Key takeaways
- A specification describes the product; a checklist tells the inspector what to check, how, and what fails.
- Every check line needs a measurable limit. "Good finish" cannot be judged; "no runs or bare patches visible in daylight" can.
- Write the defect list before production, with each fault classed critical, major or minor, so the factory knows the standard too.
- Keep the checklist to what can be verified at the factory in the time booked. Chemical and safety compliance goes to a lab.
What an inspection checklist contains
Your specification or tech pack says what the product should be. The inspection checklist turns it into instructions an inspector can follow at a factory, and a factory can read before production. It has three parts:
- Check lines. Each product, packing and label requirement, with how it is checked and the pass limit.
- Defect list. The faults you expect, each classed critical, major or minor.
- Inspection plan. The sampling plan, on-site tests, lab samples, photos and how the result is decided.
Send the checklist to the factory with the purchase order. A supplier who knows what will be checked can check it first.
From our inspections
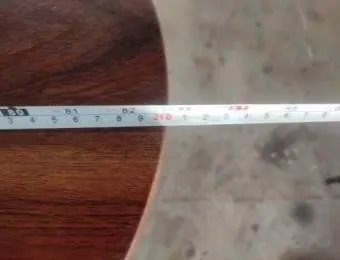
Real photos from our published sample reports, anonymised. Click a source to read the full report.
Turn each requirement into a check line
Go through the specification line by line. For each requirement write five things: the requirement, the method, the tool, how many units, and what fails. A few examples:
| Requirement | Method and tool | Units | Fails when |
|---|---|---|---|
| Table height 55 cm ±0.5 cm | Tape measure, floor to top | Every sampled piece of the style | Outside 54.5–55.5 cm (major) |
| Solid wood moisture at or below 11% | Calibrated pin meter, readings at several points | A set number per style | Any reading above 11% (major) |
| Colour and sheen match the approved sample | Side by side with the sealed sample, in daylight or a light box | Every sampled piece | Visible difference (major, or Hold for your decision) |
| Cushion cover 45 × 45 cm ±1 cm | Measured flat, seam to seam | Every sampled piece | Outside tolerance (major) |
| Zip runs smoothly end to end | Open and close by hand | Every sampled piece | Sticks, splits or pulls off (major) |
| Care and fibre label as per artwork | Compared with the approved artwork | Every sampled piece | Missing, wrong content or wrong language (major) |
| Carton marks and barcode | Compared with artwork; barcode scanned | Every sampled carton | Wrong mark or barcode does not scan (major) |
Use numbers wherever you can: dimensions with tolerances, moisture limits, GSM, weights, counts. For appearance, state the light, the viewing distance and the reference: the approved sample, a limit sample or a photo standard.
Write the defect list and class each fault
A defect list names the faults the inspector will look for and decides in advance how serious each one is. Use three classes:
- Critical: could cause injury or breaks a mandatory rule. Examples: a storage unit that tips forward, a sharp edge, a missing warning label your market requires. One critical defect fails the lot.
- Major: likely to make the product fail in use or be returned. Examples: a crack, a size outside tolerance, a drawer that sticks, a wrong colour.
- Minor: a departure from the standard that is unlikely to cause a return. Examples: a small scratch on a back panel, a loose thread end.
Two refinements make the list more useful:
- Zones. Split the product into visible faces (top, front), less visible faces (sides) and hidden areas (back, underside), and allow more on hidden areas. A scratch on a table top and on its underside are not the same fault.
- Natural variation. For hand-made goods, say what is not a defect: grain and knots in solid wood, slubs in handloom, small differences in hand-painting or hammered metal. Define the range with limit samples or photos.
For product-specific lists, see the defect libraries for wooden furniture, upholstered furniture, handicrafts and metalware, rugs, garments and ceramics and glassware, and the glossary entries for critical, major and minor defects.
Add the inspection plan
The plan tells the inspector how many units to check and how to decide the result:
- Sampling. ISO 2859-1, inspection level (usually general level II) and an AQL per class, for example 0 critical, 2.5 major, 4.0 minor. See AQL sampling explained.
- Tests on fewer units. Slow tests such as full assembly or a carton drop are often run on a smaller sample. ISO 2859-1 has special inspection levels (S-1 to S-4) for this, or you can state a fixed number.
- On-site tests. List each one: assembly, function, moisture, drop test, barcode scan.
- Lab samples. Which tests, how many units, and where they go. See lab testing coordination.
- Photos. Which views you need of every style, carton and finding.
- Decision rules. What fails the lot, and what you want reported for your decision, such as packing or label differences.
Check the workload against the time booked. As a guide, one Clear To Load man-day covers one factory and up to 3 furniture styles at general level II, or up to 5 styles of smaller décor, textile or kitchen items.
Add what your market requires, if it can be seen
Market rules belong in the checklist only where they can be verified at the factory. Typical lines:
- Warning labels present and correct, such as the tip-over warning for clothing storage units sold in the US (STURDY Act).
- Traceability details on the product or packaging for the EU (GPSR): type or batch number and contact details.
- Country-of-origin marking on the product and carton.
- Textile fibre content labels in the right language (EU textile labelling, Canada).
- The ISPM 15 mark on wooden pallets and crates.
- A lab report that exists and matches the goods: same style, material and colour.
Formaldehyde, lead, flammability or stability to a standard are lab tests. The import compliance pages list the rules by market.
Common mistakes, from real reports
- No tolerance. In Sample 01 the PO gave no dimensional tolerance, so deviations of up to +1.5 cm could only be recorded, not judged.
- No sealed sample. In Sample 02 approved samples were not available for every style, so finish was judged against the PO description.
- Vague words. "Good quality", "nice finish" and "as per sample" with no sample at the factory.
- Too much for the time. Fifty check lines on twenty styles will not fit one day.
- Lab tests on the checklist. An inspector cannot verify a chemical limit by eye.
- Never updated. Add a check line every time a customer complaint or a past finding shows a new risk.
Checklist template
Use this structure for each product:
- Header: buyer, supplier, PO number, styles and quantities, inspection type and date.
- References: specification version, drawings, approved sample reference, label and carton artwork.
- Sampling plan: standard, level, AQL per class, special-level tests.
- Quantity and packing: count, carton marks, inner packing, pallets.
- Product check lines: conformity, dimensions, materials, colour and finish, function.
- Labels and markings: product, care, warning and origin labels; barcodes.
- On-site tests: list with sample size and pass limit.
- Defect list: fault, zone, class.
- Photos required.
- Decision rules: what fails the lot and what is reported for your decision.
When you book an inspection, attach the checklist. If you do not have one, send your PO and specification: the inspector works to the Clear To Load checklist for the product type and checks against what you send. For how the checklist is used on the day, see the pre-shipment inspection checklist.
Sources
- ISO 2859-1:2026, Sampling procedures for inspection by attributes, Part 1 (iso.org)
- Safety Standard for Clothing Storage Units, 16 CFR 1261, Federal Register, 4 May 2023
- Regulation (EU) 2023/988 on general product safety (EUR-Lex)
- Clear To Load sample inspection reports (six anonymised furniture inspections, 2022–2023)